Recommend on google

Recommend this page on GOOGLE
Follow me on twitter here..
Like Us on Facebook

Search this blog

Showing posts with label tips. Show all posts

Thursday, November 28

Enable GOD Mode in Windows 7

Did you ever fantasize about a location, that could give you access to all the important settings of your Windows PC at a single place? It is a real pain to go through the entire Control Panel and search for all the settings, and when you want to do something else, you have to restart the Control Panel again and start hunting all over the item again.

This is were some tricks come to your rescue. As the title suggests - GOD mode is a feature in Windows that allows a single hub for all the crucial settings of your Windows PC.

Here is a screenshot of the GOD mode. (Click on the image for actual version)


As you can see, it gives you access to all the important settings.
You can also enable it by following the below steps.

Step 1: Go to your Desktop and Right click.

Step 2: Click create folder.

Step 3: Name your new folder this, "GodMode.{ED7BA470-8E54-465E-825C-99712043E01C}" and press enter. (without the " obviously)

Step 4: Watch as the folder changes form to look like the control panel.

Step 5: Open the folder and bask in all your godly, control panel power.

Thursday, October 17

Add Slide To Shut Down on your touch enabled Windows 8 PC

This is a hidden gem within Windows 8.1, and it’ll be more useful for those using a touch screen device than a PC. You can open up a transparent window that allows you to swipe down to shut down your PC or device.

In order to activate this feature, you have to do some digging around in the Windows folders.

Open “Windows Explorer” and navigate to:
C:\ – Windows – System32
 Locate the entry "SlideToShutDown". Right Click on it and select "Send To"
Click on "Desktop (Create Shortcut)"
This will place a shortcut on your Desktop to the Slide to Shut Down feature.

Anytime you want to use this to shut down your PC, just click on the shortcut. You can also pin the shortcut to the Start Screen if you so desire or create a keyboard shortcut to activate it.

In order to do that latter, right-click on the shortcut you created on your Desktop and click on "Properties".


In the Shortcut key: box, enter in the combination for the keyboard shortcut. Make sure to click “Apply,” then “OK.”

Now whenever you want to ShutDown your PC, just use the keyboard shortcut you defined and you will be presented with the "Slide To Shut Down" screen.


Monday, September 30

Get a really thin taskbar on the side in Windows 7

Most of us don't like the normal position of the taskbar in Windows 7, and we shift it to the left or right side of the desktop.

Reducing the size of icons on Taskbar can definitely give you more space, but there is a limitation on the thin-ness of the taskbar. You can only reduce the length to a defined limit.

What you get is this type of a taskbar.


The problem is that you feel cheated and there is some extra space on side of each of the active application.
Could there be a way to get rid of it?

Luckily, there is...

Step 1.>
Right-click on your taskbar and click on properties.

Step 2.>
Check the boxes- 'Auto-hide the taskbar' and 'Lock the taskbar'. Click on apply and then click on OK. The taskbar should now be hidden.


Step 3.>
Open up notepad and type the following commands as it is:-
@echo off
echo ThinTaskbar
echo Please wait a few secconds...
net stop "UxSms"
net start "UxSms"

Step 4.>
Save the file with anyname and add the extension .bat
Example:- thinBar.bat

Step 5.>
Run the file with administrator privileges. Right-click and select Run As Administrator.

Step 6.>
This should stop the Windows Aero and restart it. Your taskbar gets auto hidden by default.

Step 7.>
Again open the taskbar properties and uncheck the box 'Autohide the taskbar'.


This should now give you a really thin taskbar and some more space on your desktop. :)


Monday, September 16

How to remove people from photographs using photoshop.

Here is a sample tutorial that will give you a brief idea about how to remove unwanted people from a photograph.
Before proceeding further, make a note that this example is for a very specific scenario.

Scenario:- You want to take a photograph of a monument, but you are just unable to do so because so many people are getting in your way.

Here's how you can do this.

Step 1.> Mount your camera on a tripod stand and take 20 photographs of the monument keeping the exact same position of the camera and the settings. Take these photographs each with an interval of 10 seconds.

Step 2.> Open these photographs in Adobe Photoshop all at once. You can do this by
File-> Script-> Statistics

Choose "Median".

That's it. You are done :)

Here are the sample results.


The results obviously depends upon the number of photographs taken and I have assumed that all the people in the photograph are in a moving state. Suppose that there is a couple who is sitting throughout the photo shoot at the same location, they will still be included in the final result.

Try it for results.

Monday, September 9

Get the most out of VLC media player

Here are some tips to get the best out of your VLC media player.

Reduce Video Lagging
Old computers seem to have a problem while playing high resolution videos and certain formats. This can be fixed by using a simple trick. Go to Tools->Preferences->Inputs and Codecs. In the Codec section change the settings of the 'Skip H.264 in loop de-blocking filter' from None to All and save the setting.

Reduce Pixellation
Low quality videos can be enhanced by reducing pixellation and blockiness effects. This can be done by enabling post processing option by going to Video->Post Processing. A higher number denotes a higher level of post processing. What this option effectively does is employ a filter on every frame that smoothens the image . Hence you end up losing on image detail, but block effects are smoothened out. As this is computationally intensive, it is best applied on laptops with high processing power.

Video Effects
VLC has some really cool video effects options. You can tinker around with a variety of these by going to Tools->Effects and Filters->Video Effects. Ever wondered if Yuvraj's flick six off Brett Lee would look as elegant if he were right handed? You can check that out by flipping the video horizontally using Geometric Filters. Motion blur effect can be added in real time using Advanced Filters. There are a load of options for changing colour, contrast, brightness, sharpness, etc.

Snapshots
Want to tell a friend about a blooper that appeared in a movie? Well, take a snapshot. Pausing at the right moment for a snapshot is invariably difficult. In VLC, you can enable advanced controls by View->Advanced Controls. The right most button in the new row of buttons is the frame by frame playback button. Repeated pressing of the button will enable to play and pause your video playback frame by frame. That makes the task of taking a snapshot quite comfortable. You can take a snapshot of a frame by Video->Take snapshot. The picture is saved in the My Pictures folder of your home folder.

Tuesday, July 30

Add shortcuts to My Computer in Windows 7 and Windows 8


The ‘My Computer’ icon gives us easy access to our hard drives , pen drives and other network-related locations. But if you’re one who enjoys a clutter-free desktop, then maybe you can use this tweak to remove the many program and folder shortcuts on your desktop.

1.> Adding program shortcuts to My Computer

First you’ll have to navigate to a special folder. Shortcuts placed in this folder will be displayed on ‘My Computer’.
Hit Windows Key + R and type in %appdata% into the box and click on OK.

Appdata 

Then navigate to Microsoft > Windows > Network Shortcuts. Program shortcuts that you place here will be shown on ‘My Computer’, it’s that simple.

Network Shortcuts 

Once you have placed program shortcuts into that folder, you’ll be able to see the shortcut icons on ‘My Computer’.

My Computer Shortcuts


2.>  Adding Folder Shortcuts

Because you can add any shortcut, you can also add folder shortcuts. To easily do that, just right click on your frequently used folder and click on Create Shortcut.

Create Shortcut

Now all you have to do is cut (Ctrl + X) the created shortcut and paste (Ctrl + V) into the Network Shortcuts folder, like how we transferred the program shortcuts earlier.

Folder Shortcut

Thus, it serves a neat way to get your things organized. Do try it out and please leave your comments if you find any problem.

Monday, July 15

Download subtitles automatically to VLC Media Playe

It's not really hard to find subtitles online for your digital movie collection, but you can save a couple of steps with the VLSub extension for VLC media player.
After downloading the extension from Github, just drop it in the appropriate folder.
  • Windows: C:/Program Files/VideoLAN/VLC/lua/extensions/
  • OS X: /Applications/VLC.app/Contents/MacOS/share/lua/extensions/
  • Linux: ~/.local/share/vlc/lua/extensions/

You can download the extension over here.

Download Link.

How to use it?
  • Start VLC
  • Start your video
  • Click on the menu View > VLSub or VLC > Extension > VLSub if you're using Mac OS X
  • Click on "Search by hash" or "Search by name"
  • Select a subtitles file on the list
  • Click on "Download selection"
  • That's it, the subtitles should appear on your video

Monday, May 20

Enable .NET Framework 3.5 in Windows 8 in offline mode

If you open CMD.EXE with Administrative Privileges i.e. at elevated level & run the this DISM command dism /online /get-features you will see that from the State that .NET Framework is not part of the Operating System.

image

image

So the first thing you need to do is to copy the required package to local machine before you run the command to install .NET Framework. To do that use Windows 8 ISO/DVD/USB Media. You need to copy SXS folder to local machine located at D:\sources\sxs (In this case D: your drive letter on which you have loaded Windows 8 Media)

image

You can also use the following command to copy this folder locally. xcopy d:\sxs\*.* c:\sxs /s
Once completed, in order to install this feature you can run the following command dism /online /enable-feature /featurename:NetFx3 /All /SourceC:\sxs /LimitAccess  and hit Enter

image

After completing the installation of .NET Framework 3.5 you can see that the feature is enabled in the Control Panel –> Program and Features

image

Bingo. Now you can enable .NET Framework feature on Windows 8 without needing of an internet connection.

Enjoy

Thursday, May 9

Change folder colors in windows

With the changing versions of windows, we have seen changing themes and styles but one thing remains pretty much the same. The color of your folder icons. You get the same boring yellow color in all versions of windows, whether it be Windows 95 or the latest Windows 8.
Searching for a specific folder when you know you need to access it again and again can be a pain.
Luckily, there is a free tool that allows you to change your folder colors as per your desires. Here is a look about what the software can do for you...


Changing the color of the folder icon could help you spot and differentiate folders easily, rather than just depend on the folder name.

Step 1.> DOWNLOAD AND INSTALL

Download and install this free tool Folder Colorizer. Install the software to your desired location and also make sure that you have .NET frameword 4.0 or higher installed. If not, the software will itself prompt you to download it. Just click yes.


Step 2.> CHANGING COLORS

To start differentiating your folder, select any folder icon you want to change the color of, right click on it, select ‘Colorize!’ and then pick any preset color.


 Step 3.>CHANGED COLORS

Once you have selected a color for your folder, your folder icon color will change automatically from the standard yellow to the color you picked.


Step 4.> CHANGE COLOR

If you need to use custom colors, right click again, select ‘Colorize!’ and select ‘Custom…’


 Step 5.> CREATE CUSTOM COLOR

From the window, pick any color you want to use, then click on ‘Add Color’. This custom color will be saved as a preset color, so the next time you want to use it, you can select it straight from the list.


Step 6.> RESTORE ORIGINAL COLOR

Should you decide to restore the original color of your folder icon, right click on the folder, select ‘Colorize!’ and pick ‘Restore original color’. The changes will be made immediately, and you will see that the color of your folder icon has returned to the original yellow.


Please do share the feedback and problems if any.

Thursday, March 28

How to download subtitles easily

We all love watching movies on our PC..but sometimes the dialogues or the sound becomes too fuzzy that we need to get the subtitles for that movie. May be you do not get the accent of the actor and you are unable to follow his voice.
There could be even simpler reasons like a lot of background noise. Subtitles definitely help in such a case.

What do you do when you need to download subtitles?
Some options are searching for a direct file online or maybe going to specific sites that offer you subtitles like www.subscene.com or www.opensubtitles.org

I am going to tell you an easy way to download subtitles, without the hassle of opening them, saving them and definitely deleting them later on.

DIFFICULTY Level: Very easy.

Here's how you do it.

Step 1.>
Download Media Player Classic. Don't worry, its an extremely light weight player and most of us use VLC but the good news is that this player also supports most of the file formats.
Download it here. 

Step 2.>
Install the player and open any of your favorite movie in this player.

Step 3.>
I am gonna demonstrate you by opening one of my favorite movies 'Catch Me If You Can'

Go to File-> Subtitle Database-> Download


Step 4.>
Wait for sometime till the player retrieves a list of all the free subtitles available online. Then you get a list something like this.


Step 5.>
Select the subtitles in your desired language. I have selected the English one and try to match the title with the subtitle name if you haven't edited it yourself. Matching is completely optional and you may skip it.

Click download and open. That's it.... :)
Your movie now has subtitles...easy right...??


Sunday, March 17

Scan QR codes directly from your browser

QR codes have been around for a while and you must have seen various images all over the internet that resemble these.


The technical definition of these codes is:-

"A QR code (Quick Response code) is a type of matrix barcode which consists of black modules arranged in a square pattern on a white background. The information encoded can be made up of four standardized kinds of data (numeric, alphanumeric, byte/binary), or by supported extensions virtually any kind of data."

In a easy way you can consider these matrix an easy way to represent codes , contact information, some web links or simply a small message.

Most of the mobiles these days have a Barcode reader or a QR code reader. If you have one you can try hovering your mobile camera and see what is contained in these codes.

BUT what if you don't have a mobile that supports this functionality. Well, your PC can do almost anything then why not this... ;-)
Now, here’s how you can exactly Read QR Codes on Computer from your browsers and get to know what does a QR code has behind it. Check it out

STEPS:-

Step 1.>

Download the QR code reader for your respective browser.


Step 2.>

Install the extension in your browser and give it any permission if it requires.


Step 3.>

That's it... :-D
You are done. Now hover over to any QR code and right-click on it. You will get an option to read a QR code. Click on it and you will get the hidden message.


If you are done. Try reading this sample code I generated for you.... :-)


Saturday, February 23

Create custom shortened links

When you do a lot online there is usually a need to track which of your efforts are actually being paid attention to and which are not. One way is to track how many people are clicking on the links you post. Bit.ly is a service letting you shorten links, but did you know you can customize those links?

A Bit.ly account

The best route with this process is to create a free Bit.ly account. This will give you more options that we’ll talk about later.
custom-link-sign-in
The sign up steps are pretty minimum. You can put in the usual info or use Facebook or Twitter to create an account.
custom-link-create-account
Once you have an account, you should see a dashboard like this.

custom-link-dashboard
Near the top right you will see the Puffer fish near the text box. This is where you will paste a long link to shrink it.

custom-link-paste-link

When you shrink a link it will look something like this.


See the link next to the word copy in the bottom right? This is your shortened link. If you were to copy and paste this link to anywhere, the person clicking on your link will be taken to whatever link you shrunk.

Creating a custom link

To make your own link, you can click the pencil next to the link. The box will pop up and let you type whatever you’d like in the box.


What you will want to do here is add something descriptive. If you are linking to an article you wrote about big orange spiders, you can add that as your custom link. I made a link with the end “nikoo28blog”.


Now you can easily share this link with your friends without the hassle of remembering long names... :-)

Thursday, February 14

Convert file

Have you ever encountered problems like you have a pdf file but you require it as a jpeg image. The screen capture wont work because the file is large to fit in one screen.
Maybe you want to go the other way round and convert this jpeg to pdf.

What about music? You have a .wav file but want the mp3 version or the .ogg version.
What about video? You have a .flv version but want the .avi version.
Everyone has his/her own conversion needs.

Definitely one way is to have a encoding tool or a different converting tool for each type of file.

Luckily, there is a easier way... :-)

Recently I came across this excellent online tool that meets all your conversion needs.

Step 1.>
Open www.zamzar.com
The site offers a pretty simple interface in which you need to upload the file you want to convert.
Let it be any image file. Upload the file and proceed to step 2.

Step 2.>
Choose your format.

As you see, the site offers multiple options for conversions. Select your desired output and proceed.

Step 3.>
Since the site is absolutely free, they now ask you for your email address where the converted file will be sent.

Step 4.>
Click on convert and you are good to do. Depending upon the file size you will receive a download link in your inbox.
Converting was never this easy... :-)

Friday, January 25

Download all photos from a facebook album

Do you like to download all photos from a Facebook album? What do you do...save every image one by one...??
Well this could be a method if a album contains 15-20 images but what about a case when a album has many photos, lets say 100...and you just somehow want all these photos on your hard disk..??

Here's a way to do so...and the best part is that it can be any album, yours, your friend's or any Facebook page as well...lets go..!!

Step 1.>
Open www.picknzip.com . Click on login at the top. It will ask to connect with your Facebook account and you may give the necessary permissions.


Step 2.>
Select the name of your friend or any group or any page that you have liked to download the photos from it. This list can be found on the left side of the page.
To download your own photos, click on the green button that says 'find my photos and videos'. After a while all your albums will appear in front of you.


Step 3.>
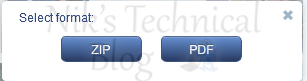
Select any album that you wish to download and you will be prompted with an option to download in a 'zip' format or 'pdf' format. I personally recommend the zip format but its up to you.


Step 4.>
Once you select the option, watch the magic happening... ;)


Step 5.>
The process completes depending on the number of photos in the album you have selected. The website now prompts you to save the file to a location on your hard disk. Chose any convenient location and you are good to go..


I hope this post helped you someway or the other...share your opinions/problems in the comments below..
Related Posts Plugin for WordPress, Blogger...